
Are you experiencing sluggish gear shifts in your 2000 Audi A8? Wondering how to maintain its transmission for optimal performance?
You will learn how to change the transmission fluid on your 2000 Audi A8 step by step in this article, ensuring smooth gear transitions while extending its life.
If you want to make sure your Audi A8 is doing its best, you should tune it out and refresh the transmission fluid.
Preparation
In the meticulous process of preparing for a transmission fluid change in your 2000 Audi A8, attention to detail is paramount. This pivotal step sets the foundation for a successful maintenance procedure, ensuring both efficiency and safety throughout the task. Firstly, gathering the necessary tools and materials is akin to assembling a surgeon’s instruments before a delicate operation. From a sturdy jack stand to elevate the vehicle securely, to safety glasses and gloves, every item plays a crucial role in safeguarding against potential hazards and facilitating a smooth workflow. These tools not only enhance efficiency but also underscore the importance of prioritizing safety in automotive maintenance endeavors.
Transitioning seamlessly from the gathering phase, the implementation of safety precautions stands as a non-negotiable aspect of the preparatory stage. Utilizing jack stands to elevate the vehicle ensures stability and minimizes the risk of accidents during the fluid-changing process. This safety measure, akin to a safety net, provides peace of mind, enabling the mechanic to focus on the task at hand without apprehension. Furthermore, donning safety glasses and gloves serves as a shield against potential splatters and exposure to harmful chemicals, fostering a secure working environment conducive to optimal performance. Embracing these safety measures is not merely a suggestion but a requisite, reflecting a commitment to professionalism and diligence in automotive maintenance practices.
As the preparatory phase unfolds, meticulous attention to detail emerges as a recurring theme, underscoring the significance of precision in every aspect of the transmission fluid change endeavor. This meticulous approach echoes the meticulousness of a seasoned artisan, meticulously crafting a masterpiece with unwavering focus and dedication. From ensuring the proper alignment of the jack stands to donning safety gear with precision, each step contributes to a seamless execution, laying the groundwork for a successful outcome. In essence, the preparation phase serves as a testament to the adage that success is not merely the result of action but the culmination of meticulous planning and execution.
Locating the Transmission Fluid Drain and Fill Plugs
When delving into the intricate process of locating the transmission fluid drain and fill plugs in the esteemed 2000 Audi A8, a comprehensive understanding of the vehicle’s transmission system is indispensable. This transmission system, akin to the intricate network of veins and arteries in the human body, serves as the lifeline of the vehicle, facilitating the seamless transfer of power and ensuring optimal performance on the road. Within this system lie two crucial components: the transmission fluid drain plug and the transmission fluid fill plug, each playing a pivotal role in the maintenance and functionality of the transmission.
Understanding the Audi A8’s Transmission System
The transmission system of the Audi A8 embodies a harmonious blend of engineering precision and technological innovation. Equipped with a sophisticated automatic transmission, this luxury sedan delivers smooth gear shifts and responsive performance, elevating the driving experience to unparalleled heights. Within this system lies a labyrinth of components, including the transmission fluid drain and fill plugs, which serve as access points for fluid maintenance and replenishment.
Identifying the Transmission Fluid Drain Plug
The transmission fluid drain plug, akin to a hidden gem nestled within the intricacies of the transmission system, plays a pivotal role in the fluid-changing process. Typically located on the transmission pan, this plug facilitates the removal of old transmission fluid, allowing for a clean slate and optimal performance. Identifying this plug requires meticulous attention to detail and familiarity with the vehicle’s anatomy, ensuring a seamless transition to the next phase of the maintenance procedure.
Locating the Transmission Fluid Fill Plug
Complementing the transmission fluid drain plug is its counterpart, the transmission fluid fill plug, which serves as the gateway to replenishing the transmission fluid reservoir with fresh, high-quality fluid. Positioned strategically on the transmission casing, this plug ensures easy access for fluid replenishment, enabling mechanics to maintain optimal fluid levels and preserve the integrity of the transmission system. Identifying this plug entails a keen eye for detail and a thorough understanding of the vehicle’s layout, paving the way for a successful fluid-changing endeavor.
In essence, the process of locating the transmission fluid drain and fill plugs in the 2000 Audi A8 transcends mere mechanical proficiency, requiring a profound understanding of the vehicle’s transmission system and a meticulous approach to maintenance. By embracing these principles and adhering to best practices, mechanics can navigate this intricate process with confidence, ensuring optimal performance and longevity for this iconic luxury sedan.
Draining the Old Transmission Fluid
When it comes to the meticulous task of draining the old transmission fluid from your vehicle, precision and attention to detail are paramount. This crucial step in the maintenance process ensures the optimal performance and longevity of your transmission system, safeguarding against potential issues and preserving the integrity of your vehicle. Follow these step-by-step instructions to execute the fluid-draining process with precision and proficiency:
Step-by-Step Instructions for Draining the Old Transmission Fluid:
- Prepare the Vehicle: Ensure the vehicle is parked on a level surface and the engine is turned off to prevent any accidents or injuries.
- Locate the Drain Plug: Using a wrench or socket set, locate the transmission fluid drain plug underneath the vehicle. Refer to your vehicle’s manual for the exact location, as it may vary depending on the make and model.
- Position the Drain Pan: Place a suitable drain pan underneath the transmission fluid drain plug to catch the old fluid as it drains out.
- Loosen the Drain Plug: Carefully loosen the drain plug using the appropriate tool, ensuring not to strip or damage the plug in the process.
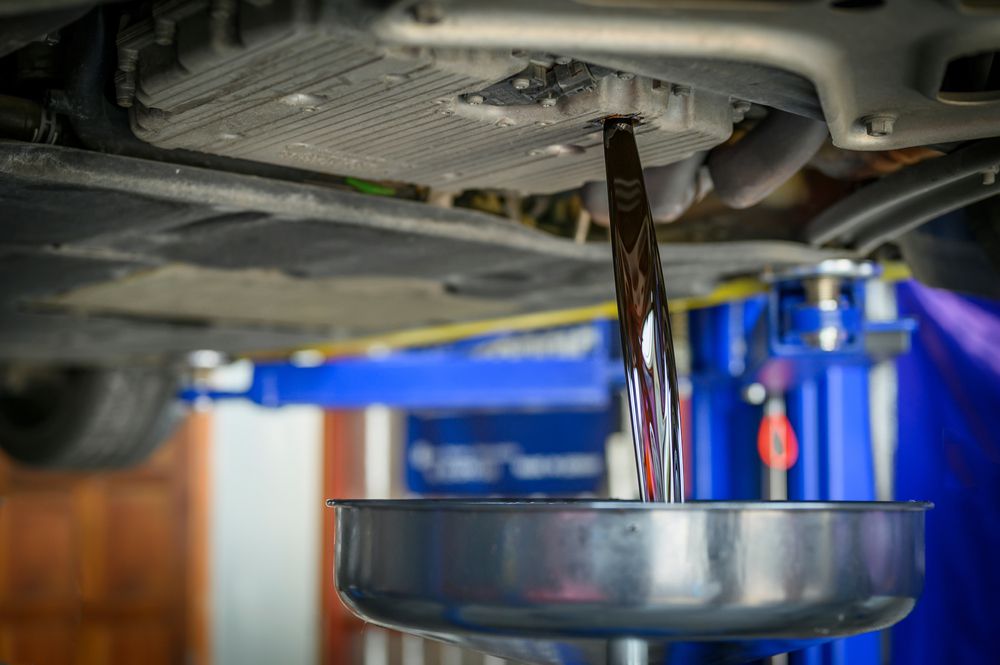
- Drain the Fluid: Allow the old transmission fluid to drain out completely into the drain pan. This may take several minutes, depending on the amount of fluid present in the system.
- Inspect the Fluid: Take a moment to inspect the old transmission fluid for any signs of contamination or debris, which may indicate underlying issues with the transmission system.
- Tighten the Drain Plug: Once the fluid has drained out completely, securely tighten the drain plug back into place to prevent any leaks or spills.
Proper Disposal Methods for Old Transmission Fluid:
- Recycling Centers: Dispose of the old transmission fluid at a certified recycling center or hazardous waste disposal facility in accordance with local regulations.
- Professional Services: Alternatively, you can enlist the services of a professional mechanic or automotive service center to properly dispose of the old transmission fluid on your behalf.
Ensuring Complete Drainage:
- Flush the System: For thorough drainage, consider flushing the transmission system with a suitable flushing agent to remove any residual fluid and contaminants.
- Repeat if Necessary: If the fluid appears cloudy or discolored, repeat the draining process until the fluid runs clear, ensuring complete removal of old fluid from the system.
By following these meticulous instructions and adhering to proper disposal methods, you can execute the fluid-draining process with confidence and precision, ensuring the optimal performance and longevity of your vehicle’s transmission system. Remember, proper maintenance is the key to a smooth and reliable driving experience, so don’t overlook the importance of routine fluid changes in your vehicle maintenance regimen.
Replacing the Transmission Fluid Filter (if applicable)
In the realm of automotive maintenance, the replacement of the transmission fluid filter emerges as a critical aspect in preserving the health and functionality of your vehicle’s transmission system. As a vigilant caretaker of your prized possession, it is imperative to conduct periodic checks to ascertain whether the transmission fluid filter warrants replacement, thereby preempting potential issues and ensuring uninterrupted performance on the road. Here’s a comprehensive guide on how to ascertain the need for filter replacement and execute the process with precision:
Checking if the Transmission Fluid Filter Needs Replacement:
- Visual Inspection: Begin by visually inspecting the transmission fluid for any signs of contamination or debris, which may indicate a clogged or malfunctioning filter.
- Fluid Color and Odor: Assess the color and odor of the transmission fluid, as a burnt smell or darkened hue may signify the presence of impurities necessitating filter replacement.
- Performance Evaluation: Monitor the vehicle’s performance, paying heed to any irregularities such as sluggish shifting or hesitation, which may signal underlying issues with the transmission system.
Step-by-Step Instructions for Replacing the Transmission Fluid Filter:
- Vehicle Preparation: Park the vehicle on a level surface and engage the parking brake to ensure stability during the maintenance procedure.
- Locate the Transmission Fluid Pan: Using a jack stand, elevate the vehicle to gain access to the transmission fluid pan, typically located underneath the vehicle.
- Drain the Transmission Fluid: Carefully loosen the drain plug on the transmission fluid pan and allow the old fluid to drain into a suitable receptacle.
- Remove the Transmission Fluid Pan: Once the fluid has drained out completely, remove the transmission fluid pan using a socket wrench, taking care not to damage the pan or surrounding components.
- Access the Transmission Fluid Filter: Locate the transmission fluid filter, which is typically housed within the transmission fluid pan, and carefully remove it from its mounting position.
- Inspect and Clean the Pan: Take a moment to inspect the interior of the transmission fluid pan for any debris or sludge, and clean it thoroughly using a suitable solvent or degreaser.
- Replace the Transmission Fluid Filter: Install the new transmission fluid filter in place of the old one, ensuring a snug and secure fit to prevent leaks or malfunctions.
- Reassemble and Refill: Reattach the transmission fluid pan to its original position and refill the transmission system with fresh, high-quality fluid, adhering to manufacturer specifications.
- Test Drive and Inspection: Start the engine and allow it to idle for a few minutes, then engage the gears to ensure smooth shifting and optimal performance. Conduct a final inspection for any leaks or abnormalities before concluding the maintenance procedure.
By following these meticulous instructions and exercising due diligence in filter replacement, you can uphold the integrity and functionality of your vehicle’s transmission system, ensuring a smooth and reliable driving experience for miles to come. Remember, proactive maintenance is the cornerstone of automotive longevity, so don’t overlook the importance of regular checks and replacements to safeguard your investment.
Refilling with New Transmission Fluid
When embarking on the task of refilling the transmission fluid in your Audi A8, meticulous attention to detail and adherence to manufacturer specifications are paramount to ensure optimal performance and longevity of the vehicle’s transmission system. Selecting the appropriate type of transmission fluid is the cornerstone of this endeavor, as it directly impacts the system’s efficiency and functionality. Begin by consulting your Audi A8’s owner’s manual or contacting a trusted automotive expert to determine the specific type of transmission fluid recommended for your vehicle. This critical step ensures compatibility and prevents potential damage to the transmission system, safeguarding your investment and providing peace of mind on the road.
Selecting the Appropriate Type of Transmission Fluid for the Audi A8:
- Consult Manufacturer Recommendations: Refer to the manufacturer’s specifications to identify the recommended type of transmission fluid for your Audi A8 model year.
- Consider Performance Requirements: Take into account the vehicle’s performance requirements and driving conditions when selecting the transmission fluid, as certain formulations may offer enhanced protection and longevity.
- Quality Assurance: Opt for high-quality transmission fluid from reputable brands to ensure optimal performance and compatibility with your vehicle’s transmission system.
Once you’ve identified the appropriate transmission fluid for your Audi A8, proceed with the step-by-step instructions for refilling the transmission fluid, ensuring precision and accuracy throughout the process. Here’s a comprehensive guide to executing this task with proficiency and confidence:
Step-by-Step Instructions for Refilling the Transmission Fluid:
- Prepare the Vehicle: Park the Audi A8 on a level surface and engage the parking brake to prevent any unintended movement during the refilling process.
- Locate the Transmission Fluid Fill Port: Using the owner’s manual as a guide, locate the transmission fluid fill port, typically located near the transmission housing or on the transmission dipstick tube.
- Access the Fill Port: Remove any covers or caps obstructing access to the transmission fluid fill port, ensuring a clear pathway for fluid replenishment.
- Refill the Transmission Fluid: Carefully pour the recommended amount of transmission fluid into the fill port using a funnel to prevent spills and minimize contamination.
- Monitor Fluid Levels: Periodically check the fluid level using the transmission dipstick or level indicator, ensuring it falls within the recommended range specified in the owner’s manual.
- Top Off as Necessary: If the fluid level is below the recommended range, add additional transmission fluid in small increments until the proper level is achieved, taking care not to overfill.
- Replace Fill Port Cover: Once the transmission fluid has been replenished to the appropriate level, replace any covers or caps removed earlier to secure the fill port.
Checking Fluid Levels and Topping Off as Necessary:
- Routine Maintenance: Incorporate regular checks of the transmission fluid level into your vehicle maintenance routine to ensure optimal performance and longevity.
- Monitor for Leaks: Keep an eye out for any signs of fluid leaks or abnormalities, as these may indicate underlying issues with the transmission system requiring attention.
- Professional Inspection: Consider enlisting the services of a professional mechanic or automotive technician for a comprehensive inspection of the transmission system, especially if you encounter any unusual symptoms or concerns.
By following these meticulous instructions and exercising due diligence in selecting and refilling the transmission fluid, you can uphold the integrity and functionality of your Audi A8’s transmission system, ensuring a smooth and reliable driving experience for miles to come. Remember, proactive maintenance is the key to preserving the longevity and performance of your vehicle, so don’t overlook the importance of routine fluid checks and replacements in your maintenance regimen.
Testing the Transmission
In the realm of automotive maintenance, testing the transmission stands as the final frontier in ensuring the efficacy and reliability of the transmission system following a fluid change. This crucial step serves as the litmus test for the success of the maintenance endeavor, providing invaluable insights into the system’s functionality and integrity. Here’s a detailed guide on how to execute this process with precision and proficiency:
Starting the Engine and Allowing It to Run for a Few Minutes:
- Engine Ignition: Begin by starting the engine and allowing it to idle for a few minutes, allowing the transmission fluid to circulate throughout the system and reach operating temperature.
- Observation: Take note of any unusual noises or vibrations emanating from the transmission system during the idle period, as these may indicate potential issues requiring further investigation.
Shifting Through the Gears to Circulate the New Fluid:
- Gear Shifting: With the engine still running, engage the gears sequentially, shifting from park to reverse, neutral, and drive, and back again, allowing the transmission fluid to circulate and lubricate the various components.
- Smooth Transitions: Pay close attention to the shifting process, ensuring smooth and seamless transitions between gears without any hesitation or jerking, which may signal underlying issues with the transmission system.
Checking for Leaks and Ensuring Proper Transmission Operation:
- Visual Inspection: Conduct a visual inspection of the transmission system and surrounding areas for any signs of fluid leaks or abnormalities, paying particular attention to the transmission pan, seals, and connections.
- Fluid Levels: Use the transmission dipstick or level indicator to check the fluid level, ensuring it falls within the recommended range specified in the owner’s manual.
- Test Drive: Take the vehicle for a brief test drive, monitoring the transmission’s operation under normal driving conditions, including acceleration, deceleration, and gear shifting.
- Performance Evaluation: Assess the vehicle’s performance and responsiveness, taking note of any unusual behavior or symptoms such as slipping, grinding, or delayed shifts, which may indicate potential issues with the transmission system.
By meticulously following these step-by-step instructions and exercising due diligence in testing the transmission, you can ensure the optimal performance and longevity of your vehicle’s transmission system following a fluid change. Remember, proactive maintenance and regular inspections are essential for preserving the integrity and functionality of your vehicle’s transmission, safeguarding your investment and providing peace of mind on the road.
Wrapping Up
As we reach the culmination of this comprehensive transmission fluid change process, it’s imperative to attend to the final details to ensure a seamless conclusion and uphold the highest standards of automotive maintenance. Properly disposing of used materials stands as a fundamental responsibility, underscoring our commitment to environmental stewardship and regulatory compliance. By adhering to established disposal guidelines and leveraging designated recycling facilities, we can mitigate environmental impact and promote sustainability for future generations. Moreover, cleaning up any spills or mess resulting from the maintenance procedure is essential to maintain a safe and pristine working environment. Whether it’s wiping down surfaces, disposing of used rags, or addressing any residual fluid spills, meticulous attention to detail is paramount to achieve a polished finish and uphold professional standards. Finally, conducting a final inspection serves as the ultimate quality assurance measure, providing assurance that every aspect of the maintenance process has been executed with precision and proficiency. By meticulously assessing all components and connections, we can verify that everything is in place and functioning optimally, thereby instilling confidence in the reliability and performance of the vehicle’s transmission system. In essence, as we wrap up this intricate maintenance endeavor, let us reaffirm our commitment to excellence and integrity, setting the standard for automotive care and customer satisfaction.
Categories: Luxury Vehicles